So what are palettes? No I am not talking about putting your makeup on wooden pallets in the corner of your bedroom! I'm talking about makeup palettes.
Ever seen these?
Of course you have! (By the way- I just got this Morphe 350 palette and L.O.V.E. it!)
Now rather than buy all your makeup already in palette form, why not create your own?
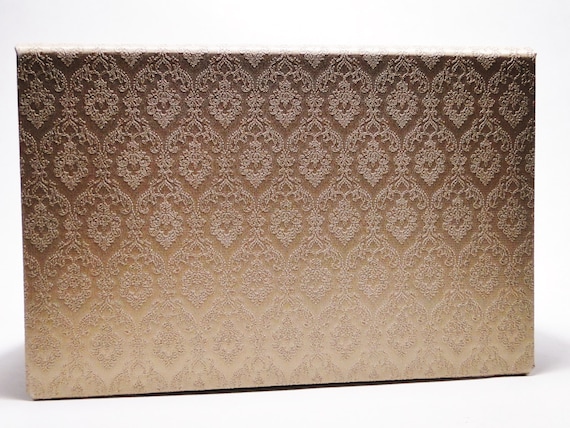
First you need an empty palette to put all your pretties in. Check out a few of these online sites that have some great empty palettes to buy. Here, Here, and Here. Also- you can make your own palette if that is your hearts desire- I found these really good instructions on this site Here. I personally bought mine rather than make it because.....well, I'm lazy. I bought a Z palette and also had a palette that I bought from a store on Etsy. She makes the prettiest palettes. Check her out Here. Love them!
Here are pictures of the palettes I personally chose: YASSSS!
Once you figure out what container you are going to use then you can get started!
Gather your supplies- what you will need for this is:
-Makeup
-Empty Palette
-Knife
-Straightener or something hot
-Foil or wax paper
-Magnets or magnet tape
Here is the process I found worked best for me!
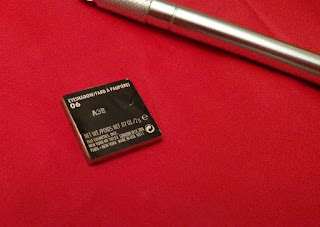
Most all eyeshadows, blushes, bronzers, highlighters, etc come in a metal "pot" that has a plastic case surrounding it. Seen here-
The metal pot is held in by glue on the bottom of the pot so that glue needs to be heated so it's easier to remove it. That is where the straightener comes in. Heat your straightener to any temp- I usually set mine to about 300. You can use something on the straightener to help protect it for this next step if you want by setting foil or some kind of wax paper on the straightener plate if you don't want to get plastic on it, but if you don't leave the plastic on the plate too long it shouldn't be a problem. I have done this both ways and both have been fine. I have also used my straightener many times since depotting my items and it is working just fine. By the way--this process is called "depotting" in case I reference that again.
Ok- so on to the steps of depotting. In my examples I am showing how I did my eye shadows- but you use the exact same process for blushes, bronzers, etc. Basically anything in the metal pots. (I will mention steps for lip sticks and stuff later in the post.
Step 1: Label removal
You might wonder why you need the label off the back of the plastic but it's very handy to have for when you want to repurchase the item- keep the label so you know exactly what to buy.
To best get the label off in one piece you need to heat up the glue that keeps the label on the back of the plastic case and peal it off. To do this place the eye shadow (entire case) on to the straightener and heat for about 6-10 seconds.
You should only keep the eye shadow on long enough to loosen up the glue under the label- not start to melt the plastic. Once you take the eye shadow off the straightener take your knife and start to peel off the corner of the label and pull it completely off. Set to the side.
Step 2: Metal pot removal (the actual depotting)
Now it's time to actually get the eye shadow out of it's little plastic home. To do this you need to place the eye shadow back on the straightener to heat up again. Leave on about 30 second since you have to heat the glue that is on the inside of the plastic casing. Remove from heat and take your knife again and gently (gently is the key word!) and guide your knife between the metal pot and the plastic. See here what I mean:
Now this takes a bit of skill. I recommend when doing this for the first time you don't start out with your most expensive and prized makeup. Start out with a cheap one that if you mess this up you won't be devastated. Keep in mind- you might have to heat the plastic longer to be able to get the glue to come off easier. So- start to work your knife in between the metal and plastic and start to pry it up. Eventually it will come lose. It will look like this:
If you mess up, you will know!
You may put a dent in your shadow or completely break it- but no fear! It doesn't mean it is completely dead- there is hope for some! In a post to come I will tell you how to fix broken eye shadows, pressed powder blushes, bronzers, and highlighters. I have broken a few eye shadows and have been able to fix them back to new. Look for that post to come soon!
Step 3: Determine if metal pot is magnetized.
You need to determine if the pot will stay in the palette on it's own or if you need to add a magnet to it. It depends on the brand of makeup if it already has a magnetic quality. Some brands like MAC or Makeup Geek actually sell their eye shadows in just the metal pot without the plastic around it (Hint- they are actually cheaper!!) and those typically can be dropped right into a palette. Just place the metal pot in a palette and see if it stays! I don't typically clean the glue off the back of the metal pot due to what we will talk about in the next step.
Step 4: Place label and magnet on back of pot.
Now that you have the label and pot separated from its plastic now you can attach the label on the back of the pot (don't worry, it won't impact the magnetic hold on the metal).
If you need magnets to be able to hold the metal pot in the palette place the magnet first, then cover with the label. You may have to cut the label to size to fit the back. The excess glue from the label and the pot will help to keep the magnet and label on.
Step 5: Place your shadow in the palette!
This is the fun part! This is when you get to see all your hard work. Organize them how you like- it's like a puzzle! I try to fit as many as possible into the palette so I can have as many as possible in one place. See my progress here:
YAAAAASSSSSSS!!!
There you have it! A way to have a one stop shop for your makeup- making room for....more! :)
You can also do this depotting method with shadows that have multiples in a pack:
I was able to turn all these separate eye shadows into one palette like the one above--Love it!
Another great tip for you-- If you depot MAC shadows- keep the plastic!! You can actually take them back to MAC (not melted and deformed- try to keep them as nice as you can) and exchange 6 plastic "clams" for one lipstick for free. It's a program called Back to MAC. It's awesome!
So this method is the way to do anything powder based but you can also depot things that are creme based. For lipsticks just cut the lipstick at the base (when it is fully extended from it's tube) and melt it into an empty metal pot. You can buy them HERE. You can also buy metal magnets that stick to the bottom of these pans or other pans if you don't want to mess with magnetic tape. Buy them HERE. Both the empty pots and magnets come in square and round shapes.
Ok, wow! That was a loooong post! Sorry about that but I wanted to make sure I went step by step through the process. I have used this many times and love the space it saves. Hope this post helps you also!
Look for posts coming about fixing broken makeup and cleaning those makeup brushes properly!


No comments :
Post a Comment