My Organized Chaos

Friday, February 12, 2016

Something a little different.....

Hey All! Hope you are having a good day/week/year!
Can you believe it's already February?! This year is already flying by! How are your new years resolutions going? Still holding on to them? I've stopped even trying to make resolutions in the last few years, because like many I break them every time! Grrrr. However, I do have things I want to accomplish this year. Maybe if I don't call them resolutions, maybe, just maybe, I will get them done. A girl can hope! 

One thing I wanted to work on is my blog. I want to expand it with different content, write more often, and reach more people. I'm hoping to make more and more connections through my blog. I love writing these posts and love sharing my interests with others. If you are reading this, then you are one of the lucky ones to hear me ramble on and on. Lucky you!! :)

So, expanding into more topics is where I want to start and I am SUPER excited to talk about makeup and all things...you guessed it......MAKEUP! In the last year or so I have become OBSESSED with all things beauty. I have been navigating the world of beauty and makeup like a new born three legged gazelle. Graceful would not be the word I would use, but I love experimenting and trying new things. 

First I wanted to review last months Ipsy bag. Heard of Ipsy? I personally have been a subscriber for over a year and love it. It's fun to get new products every month and try new brands you have never heard of. Ipsy usually sends 4-5 items in a bag, some full size products and some travel/sample size. It's always different brands and different types of products. Everything from eye liners to facial masks and lipsticks. I admit, some months I get the ipsy bag and the products may not be things I typically use or just in shades that I wouldn't look good in but on the flip side I have found some products that I love and have bought again and again. 

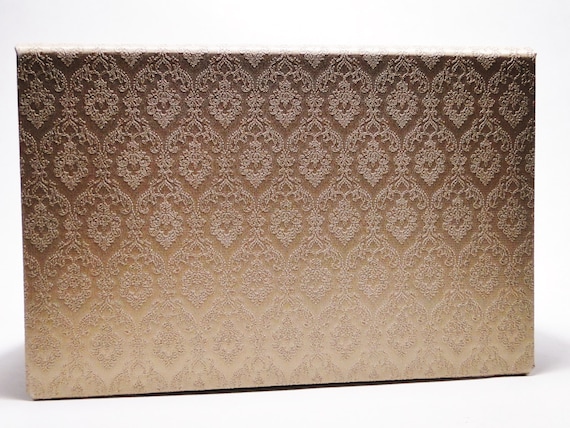
Last month's bag (January 2016) was a theme of "All Eyes on You".  

First, the bag was eh. I personally don't like the print that much. It's a good size and fits alot of stuff but the design just isn't my type.
Now on to the products!
1. theBalm Cosmetics
Mr. Write (Now) Eyeliner
I got mine in the shade Jack B. Bronze (rich bronze). I personally loved the shade. It works well with my lighter blue eyes. Don't get me wrong, I love a nice dark eyeliner but sometimes a lighter shade for day wear is nice. I have use theBalm Cosmetics in the past and always love their products. This one was no exception. It was creamy, pigmented and glided on easily. Will buy again!

2. tre'StiQue

Mini Matte Lip Crayon


I was really excited to try this lip crayon. I have used tre'StiQue's eye crayons in the past and love them. I was like a kid in a candy store when I was ripping this out of its wrapper so I could try it and then I put it on and........ didn't like it. 
I loved the formula- it was rich and creamy just like their eye crayons but the color was not for me! Way too red and made me feel like I was a rodeo clown. It may be for someone else but just not me. However, I have always been weird about red shades. 

3. pur~lisse

BLUE LOTUS 4-in-1 Eye Adore Serum

I love this and I'm not even sure it works! Ha ha. It feels so good on your skin when you apply it. It's light weight and absorbs well. You don't feel like you are walking around with greasy under eyes like I have experienced with other under eye treatments. I say I am not sure if it works because I haven't used it long enough to know if it helps with dark circles and fine lines. However, I have seen that when I use it my under eyes seem firmer and more hydrated. 

4. Mitchell and Peach

English Leaf Body Cream

This stuff feels amazing! It's packed with shea and cocoa butter and makes my skin feel hydrated and soft. It doesn't leave my skin slippery or sticky like some lotions tend to do. It is scented to smell like roses and it does! Almost too much for my liking. If you can get past the strong scent, it really does work well. 


5. City Color Cosmetics

Eyeshadow Trio in Falling Leaves

This is one of those products that is so frustrating! I love the colors! There are two shimmers and one matte. They are gorgeous neutral colors. I love that it has your base color, crease color and lid color all in one packaging. They thing that makes me frustrated is that they are not pigmented at all! I am disappointed at how many passes I have to make to get enough color on my lid. There is also alittle fall out if you don't tap off your brush before application. These colors are so pretty that I am willing to take the time to get enough color, just wish it applied better. 


So that is my review of the 2016 Jan Ipsy bag! I give it 3 out of 5. 
Over all it wasn't a bad bag, but not one that I am head over heals about. 

What types of topics would you like to hear more about? I also want to up my youtube game and plan out some more videos for your viewing pleasure. What would you like to see? Let me know!


Check me out on Facebook: Organized Chaos
Check out my Etsy store: OrganizedChaosbyAlli

Monday, December 28, 2015

Planner/Calendar time!

I love this time of year! Yes there are snowy nights, every type of spice latte you can think of and pretty pretty scarfs but I love this time of year for the planners! Yes I am a planner nerd and I'm not afraid to admit it. There is something therapeutic about having a schedule and planner ready for each week. I know if I didn't have my planners (yes that was plannerS, I have 2.  Pausing for judgement...............) I would be completely lost. Unless I write down every appointment, event or visit I just forget it. I am still apart of the old school crew that pulls out a small paper planner at the doctors office when I'm scheduling my next appointment and yes I get a giggle or a laugh every so often but I also get alot of people that say they wish they could be more organized. Yes it takes time up front to organize your life and it also takes some discipline to keep it scheduled but the pay offs are great.

Hoping to help those that need and want some organization I have again created my own planners this year. It's time to take a look at the 2016 planners!


First planner I have created is the pre-dated 2016 Monthly Planner:
  YAASSSSSSS! I'm in LOVE with this lay out! I couldn't ever find the exact thing I was looking for online or at stores so I decided to make my own! It has more than enough room to write and even has a spot for notes. I created mine so it's all shades of purple (shocker, I know). This calendar is pre-dated for all of 2016, Jan-Dec and fits to 8 1/2 x 11 paper.  See it at my Etsy store HERE.

Next planner is my personal favorite. It is the pre-dated 2016 Weekly Planner:
This literally keeps my life together. It sits in my kitchen and both my husband and I never have to question if something is going on. I also included a meal planner section at the end of each day to make sure I know what we are going to eat and what to buy. It's also helpful for spouses to know what meals they need to prepare or heat up without having to even ask. Lastly, just like the monthly planner, I have included a notes section for random jottings and such, This calendar is pre-dated for all of 2016, Jan-Dec and fits to 8 1/2 x 11 paper.
See it at my Etsy store HERE.

The final planner for this year is a new one I have not done before. The compact/smaller planner:
As I mentioned before I have 2 planners. I love my planner at home, the Weekly planner, but it is a bit bulky to carry around or everyday use. When I am at the doctors or scheduling something when I'm not at home I used to write it down on a piece of paper or type it in my phone real quick, but half the time I would forget about it and it would ever make it to the calendar at home. With this smaller, personal planner I can write the appointment or event down right away and not worry about forgetting it. I have this planner in a zip up Franklin Covey binder that I just throw into my purse and I'm good to go! I did not pre-fill the dates on these because I wanted to try having the flexibility for year to year. I did place the year on it just so I don't forget where I'm at! I love the simple design and the good amount of space to write, despite the overall size of the planner.  
Find out more on this planner on my Etsy store- HERE

There you go! The 2016 planners! I truly loved designing each of them and look forward to creating more in the future. Check out my Etsy store for more organizing printables such as grocery lists, To-Do lists, and donation trackers.


Check me out on Facebook: Organized Chaos
Check out my Etsy store: OrganizedChaosbyAlli


Monday, November 23, 2015

Consolidate your makeup easily and cheaply.....aka make room for more! Right?

Seriously, I may have a problem. A legit problem. The first step is admitting it, right? Well I am here to say my name is Allison and I am obsessed with all things makeup. I don't know where this came from (though I think it's from starting to get my ipsy subscription this last year). By the way- if you don't know what Ipsy is- you live under a rock, and if you do not subscribe- what is wrong with you??? Go! GO! Seriously LOVE Ipsy. That's another post but back to the issue of my new obsession. With this obsession I have found over time that I am running out of room for all my new pretties. After a brief witch hunt all across internet land I figured out the solution! Palettes. Yes, you may feel like that was a no brainer but after I started looking into this you can literally put almost all your makeup into a palette. Keep reading and I will tell you how.

So what are palettes? No I am not talking about putting your makeup on wooden pallets in the corner of your bedroom! I'm talking about makeup palettes.
Ever seen these?
Of course you have! (By the way- I just got this Morphe 350 palette and L.O.V.E. it!)
Now rather than buy all your makeup already in palette form, why not create your own?

First you need an empty palette to put all your pretties in. Check out a few of these online sites that have some great empty palettes to buy. Here, Here, and Here. Also- you can make your own palette if that is your hearts desire- I found these really good instructions on this site Here. I personally bought mine rather than make it because.....well, I'm lazy. I bought a Z palette and also had a palette that I bought from a store on Etsy. She makes the prettiest palettes. Check her out Here. Love them!

Here are pictures of the palettes I personally chose:  YASSSS!
Z Palette Large - Rose Gold Chevron (Makeup Geek Exclusive)
Once you figure out what container you are going to use then you can get started!
Gather your supplies- what you will need for this is:
-Makeup
-Empty Palette
-Knife
-Straightener or something hot
-Foil or wax paper
-Magnets or magnet tape

First step is to depot your makeup that you wish to put in the palette. Fun thing with this is that you can depot almost anything! Eye shadows, blushes, bronzers, lip sticks, highlighters, foundation, this list goes on and on. For my personal makeup I decided to depot eyeshadows, blushes and bronzers.

Here is the process I found worked best for me!

Most all eyeshadows, blushes, bronzers, highlighters, etc come in a metal "pot" that has a plastic case surrounding it. Seen here-

The metal pot is held in by glue on the bottom of the pot so that glue needs to be heated so it's easier to remove it. That is where the straightener comes in. Heat your straightener to any temp- I usually set mine to about 300. You can use something on the straightener to help protect it for this next step if you want by setting foil or some kind of wax paper on the straightener plate if you don't want to get plastic on it, but if you don't leave the plastic on the plate too long it shouldn't be a problem. I have done this both ways and both have been fine. I have also used my straightener many times since depotting my items and it is working just fine. By the way--this process is called "depotting" in case I reference that again.

Ok- so on to the steps of depotting. In my examples I am showing how I did my eye shadows- but you use the exact same process for blushes, bronzers, etc. Basically anything in the metal pots. (I will mention steps for lip sticks and stuff later in the post.

Step 1: Label removal
You might wonder why you need the label off the back of the plastic but it's very handy to have for when you want to repurchase the item- keep the label so you know exactly what to buy.
To best get the label off in one piece you need to heat up the glue that keeps the label on the back of the plastic case and peal it off. To do this place the eye shadow (entire case) on to the straightener and heat for about 6-10 seconds.
You should only keep the eye shadow on long enough to loosen up the glue under the label- not start to melt the plastic. Once you take the eye shadow off the straightener take your knife and start to peel off the corner of the label and pull it completely off. Set to the side.

Step 2: Metal pot removal (the actual depotting)
Now it's time to actually get the eye shadow out of it's little plastic home. To do this you need to place the eye shadow back on the straightener to heat up again. Leave on about 30 second since you have to heat the glue that is on the inside of the plastic casing. Remove from heat and take your knife again and gently (gently is the key word!) and guide your knife between the metal pot and the plastic. See here what I mean:
Now this takes a bit of skill. I recommend when doing this for the first time you don't start out with your most expensive and prized makeup. Start out with a cheap one that if you mess this up you won't be devastated. Keep in mind- you might have to heat the plastic longer to be able to get the glue to come off easier. So- start to work your knife in between the metal and plastic and start to pry it up. Eventually it will come lose. It will look like this:
If you mess up, you will know!
You may put a dent in your shadow or completely break it- but no fear! It doesn't mean it is completely dead- there is hope for some! In a post to come I will tell you how to fix broken eye shadows, pressed powder blushes, bronzers, and highlighters. I have broken a few eye shadows and have been able to fix them back to new. Look for that post to come soon!

Step 3: Determine if metal pot is magnetized. 
You need to determine if the pot will stay in the palette on it's own or if you need to add a magnet to it. It depends on the brand of makeup if it already has a magnetic quality. Some brands like MAC or Makeup Geek actually sell their eye shadows in just the metal pot without the plastic around it (Hint- they are actually cheaper!!) and those typically can be dropped right into a palette. Just place the metal pot in a palette and see if it stays! I don't typically clean the glue off the back of the metal pot due to what we will talk about in the next step.

Step 4: Place label and magnet on back of pot.
Now that you have the label and pot separated from its plastic now you can attach the label on the back of the pot (don't worry, it won't impact the magnetic hold on the metal).
If you need magnets to be able to hold the metal pot in the palette place the magnet first, then cover with the label. You may have to cut the label to size to fit the back. The excess glue from the label and the pot will help to keep the magnet and label on.
Step 5: Place your shadow in the palette!
This is the fun part! This is when you get to see all your hard work. Organize them how you like- it's like a puzzle! I try to fit as many as possible into the palette so I can have as many as possible in one place. See my progress here:
YAAAAASSSSSSS!!!

There you have it! A way to have a one stop shop for your makeup- making room for....more!  :)

You can also do this depotting method with shadows that have multiples in a pack:
I was able to turn all these separate eye shadows into one palette like the one above--Love it!

Another great tip for you-- If you depot MAC shadows- keep the plastic!! You can actually take them back to MAC (not melted and deformed- try to keep them as nice as you can) and exchange 6 plastic "clams" for one lipstick for free. It's a program called Back to MAC. It's awesome!

So this method is the way to do anything powder based but you can also depot things that are creme based. For lipsticks just cut the lipstick at the base (when it is fully extended from it's tube) and melt it into an empty metal pot. You can buy them HERE. You can also buy metal magnets that stick to the bottom of these pans or other pans if you don't want to mess with magnetic tape. Buy them HERE. Both the empty pots and magnets come in square and round shapes. 

Ok, wow! That was a loooong post! Sorry about that but I wanted to make sure I went step by step through the process. I have used this many times and love the space it saves. Hope this post helps you also!
Look for posts coming about fixing broken makeup and cleaning those makeup brushes properly!


Monday, September 28, 2015

Clutter turned decor

Hey all! Have clutter? Who doesn't at some point!? I wanted to share a project I recently did that helped de-clutter the top of my dresser. BONUS- it's now easier to clean!! Woo-Hoo!!

For Mark and I's honeymoon a few years back (I can't believe it's been 2 years already!) we went to Jamaica. By the way- looking for a place to vaca, go to Jamaica! Holy paradise! I fell in LOVE with Jamaica. Why doesn't Foot Locker open a warehouse in Jamaica?! Maybe I need to work on that......
Anyways! While in Jamaica I wanted to bring back a few souvenirs to remember our time there. I ended up picking up some really cute little shells that I found on the beach while we would go on a nightly walk. (Btw- is it illegal to bring back shells into the US? If it is....then I meant that I did NOT bring anything back. In fact I left things there.....). So, let's start again. I have a friend that brought shells back from Jamaica, not me. Anyways, this friend put the shells on display on my dresser so I would see them each day as I got ready. Sounds sweet right? Until you have to pick up each shell and clean under them each week. And by that I mean clean under them occasionally and mostly dust around them because you are too lazy to move them. This was getting old fast so I needed a better solution to display my (I mean my friends) mementos from our honeymoon without the hassle of having it in the way. 

Here are the shells from Jamaica that I used in my project. 


After many hours wasted on Pinterest I can across a really cute project that someone did with a shadow box. I immediately started work on mine! First- obviously needed to buy a shadow box. I bought mine at Michael's craft store for $10.99. 


I didn't really like the plain stark white background of the shadow box so I decided to buy a Make Market linen panel also from Michael's for a backdrop. I was able to snag this on clearance for $1.50. Score! 

This project was super easy to put together! First, I laid out exactly how I wanted the shells to look in the frame. I decided on a heart outline. After I had a general idea of how the end product would look I placed the linen panel in the shadow box and secured it down to the backing with a little clear tacky craft glue. I then glued each shell down using the same tacky glue in the desired shape and viola! Done! That's it! It was a really simple project but turned out great if I do say so myself. Last but not least it doesn't require cleaning and is a more creative way to display something I love rather than just having them propped up on our dresser. 

Here is the final result!


Love it!! Super easy and cheap! Only about $13 after tax. What can you de-clutter around your house and craft into super cute decor? I'd love to hear what projects you have done!

Until next time.....

Friday, September 25, 2015

#firstworldearbudproblems

Hey there! So something happened to me yesterday that is one of my biggest pet peeves...... tangled earbuds. Or are they called headphones even though they go in your ears..... Anyways, I know you are probably like, "Really Allison, that's your problem for the day. woooowww" #firstworldproblems #smallprobs #theywerereallytangled. Ok Ok Ok I'll stop.  Not sure why I went on a hashtag slide there. My bad!
Really- this happens to me all the time and yes I know I am to blame because I just throw them in my purse and expect them to roll themselves up. Well, they never do! 
So I took to the internet to figure out a cheap and easy way to fix this. (yes I actually looked this up. Don't judge me). I didn't want to buy some gadget that holds the cords, just a way of tying them or something easy to DIY to help. I found a few ways and wanted to share them with you!

Headphones before:

The way I am using it the way I am picturing below. It doesn't take any materials, just wrap the cords a certain way. I admit I had to think about this one to continue to wrap it correctly. May not be the best way in a hurry or until you can memorize the way to do it. Or maybe i'm just slow........that's probably it....let's be honest. 

Just make sure you loop in front of your pinky finger and behind your index finger. Lastly, pull the plug in through the hole and you are done! When ready to use, just pull the plug back through the loop and pull. They should pull apart easily!

You can always use the tried and true of just wrapping them around your fingers and wrapping the cord on itself but I like the method above because they pull apart easier. 

Some people deploy fancy or DIY gadgets to hold their headphones
Image result for wrapping headphones
Image result for wrapping earphones

Or even use containers to store their cords away from other items:
Image result for wrapping headphones

And then there are the just plain disturbing.....
Image result for wrapping headphones
Image result for wrapping earphones

It looks like the holders you can buy range any where from $1 to $30.....the disturbing gargoyle/monster/demon head was $25. Why anyone would buy that is beyond me. 

Hopefully this helps in your quest for the perfectly organized earbuds....or earphones.......or headphones......or whatever they are!

Until next time.........